
Ever wonder why some photos look amazing, with perfect detail in both the bright highlights and the deep shadows, while others look “blown out”? It all comes down to a concept called exposure latitude, and understanding it is key to getting those stunning shots. Let’s take a closer look at what is going on!
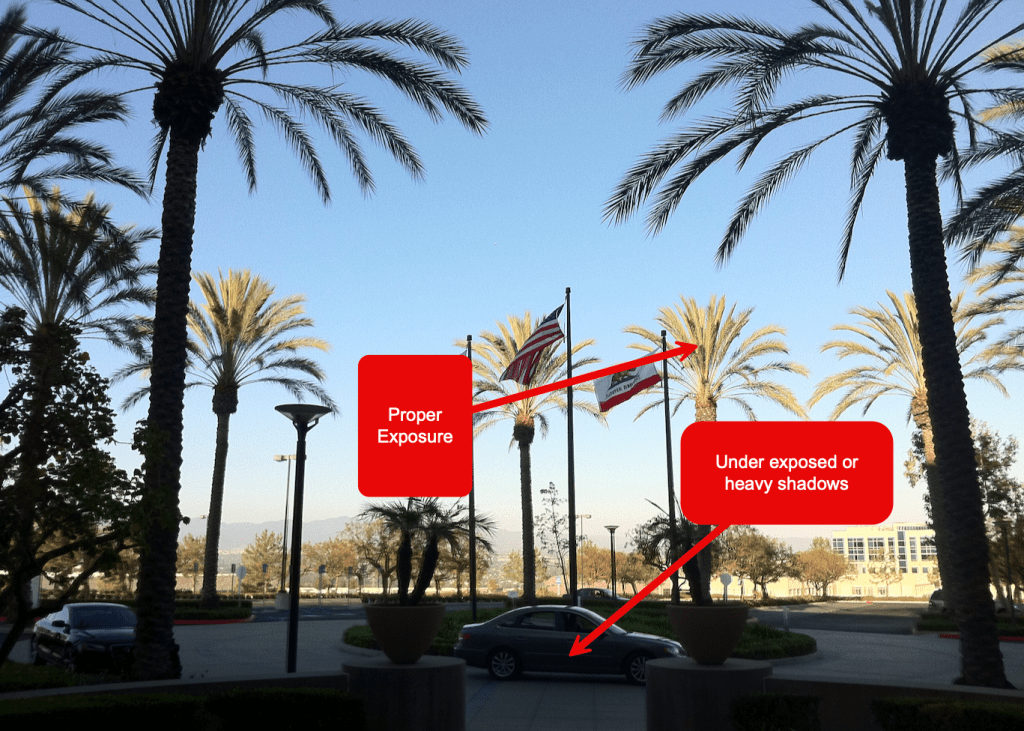
This image is an untouched iPhone non HDR picture. The camera is trying very hard to get a picture with good exposure. It struggles with both the very bright background and the darker foreground.
The sky is brilliant, but the landscape below is just a dark silhouette. That’s because digital cameras, unlike our own eyes, have a limited exposure latitude. Think of it as the camera’s ability to capture detail across a range of brightness levels.
The Exposure Problem: Digital’s Weakness
Our digital sensors measure light in a limited range. The geeky way to say it is that a sensor can capture a certain number of stops of light. A “stop” is just a doubling or halving of the light. So, if your camera’s meter says the average scene is F8, it can see a few stops brighter (like F11, F16) and a few stops darker (like F5.6, F4). But anything too bright turns into a flat, detail-less white—that’s what we call “blown out” highlights. Anything too dark becomes a solid, detail-less black. This is because the sensor data is stored as a number, typically from 0 (black) to 255 (white). Once you hit 255, there’s no more information to capture, no matter how bright the light source is. This is a big reason why many photographers loved film, which had a much wider exposure latitude and could handle a greater range of light.
HDR is a cool trick to help “extend” that exposure latitude. HDR is where the camera takes two or three sequential images very fast. One is correctly exposed for the highlights or the brighter parts and one is correct for the shadows or darker parts. Sometimes the camera will expose for the mid-tones. This depends on the software in use. Then the phone’s computer blends the images together to make one good image. Today’s cameras don even ask, they just do it for you. This process used to be done manually by you as the photographer. And even today, there are apps to force the camera to take multiple images and let you choose how to blend them for artistic reasons.
With today’s newest generation of editing software, you can do amazing work by utilizing this automatic process of smartphone based HDR.
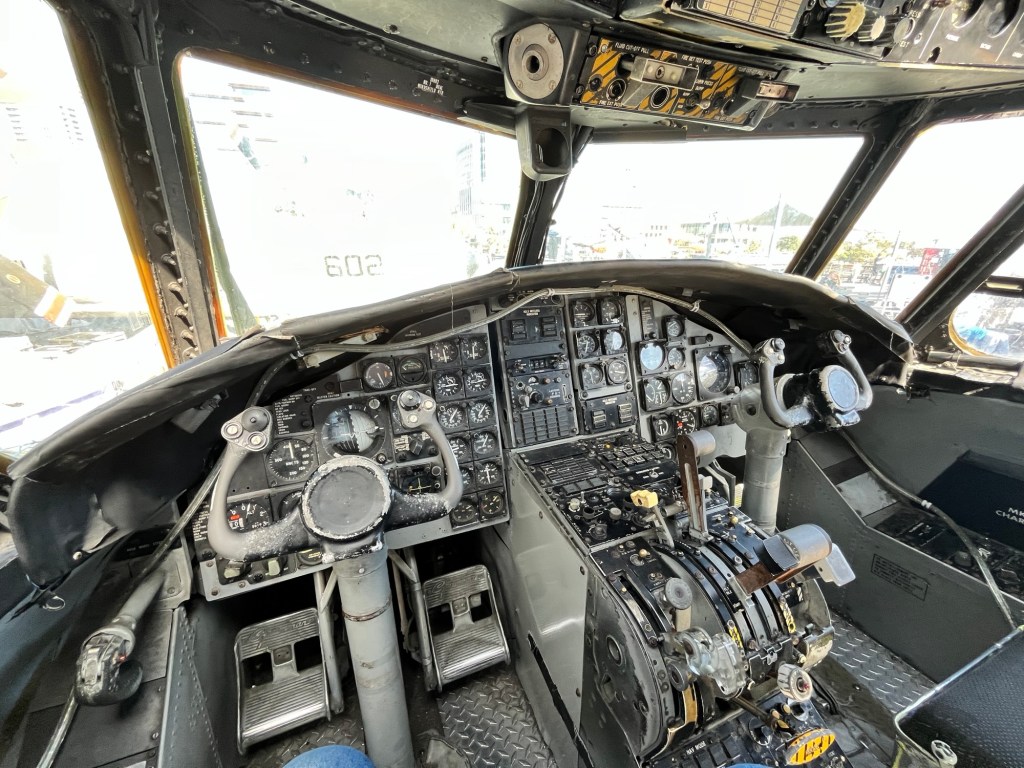
For example, take these two images. Even with the automatic camera based HDR, they are far past the limits with deep, deep shadows in the foreground and super bright sunlight outside the windows. You can clearly see how a good exposure blows out the windows and the proper exposure for the outside leaves the cockpit in heavy shadows. With the image on the left, I told the camera manually to expose the shadows correctly and to ignore the bright windows. The result is the cockpit dash is easily seen but everything in the windows is pretty much gone and unrecoverable.
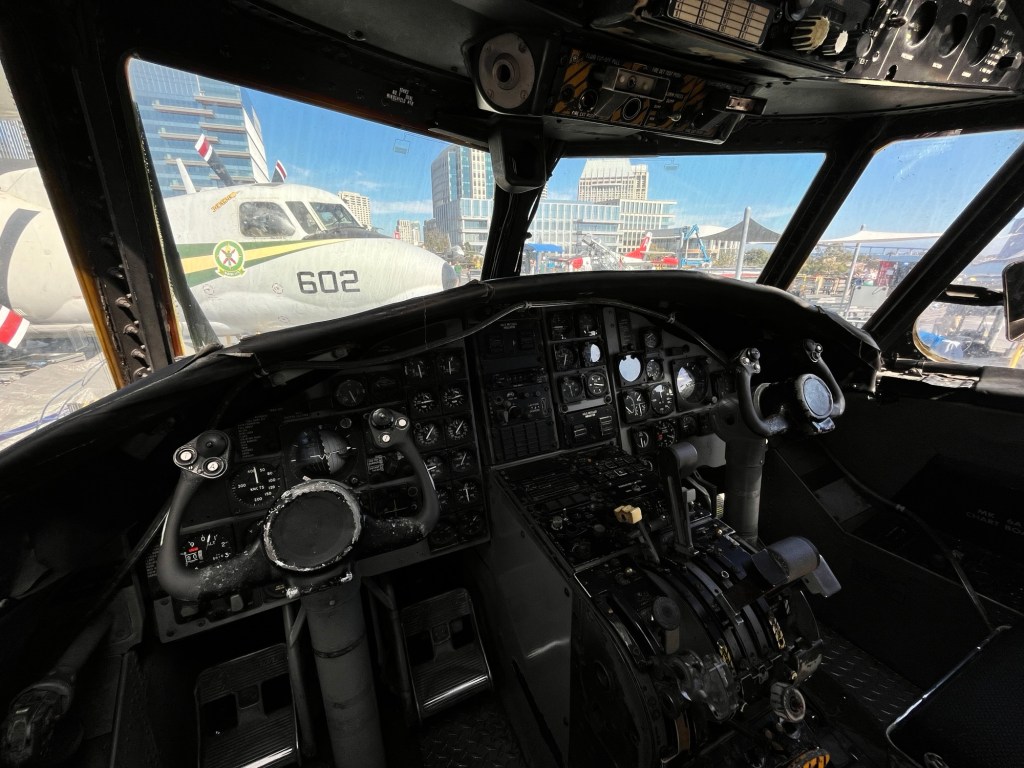
On the right hand image, the iPhone HDR function was able to get a weak exposure of the outside while getting some details inside the cockpit. You can see that the computer just couldn’t get the inside details and the outside without serious compromises. This is where our newest generation of editing software comes into its own. But the software is not magic, it still requires you (for now) to make key choices.
Here is that same compromised HDR image after I used Photoshop express on my iPhone to edit the image. The HDR while not perfect did give me more than enough digital data to rework the shadows and bring them up and keep the windows from blowing out in the process. In the “old” days, I would have to had loaded the two separate non HDR images into Photoshop, then using layers and blending, line them up and merge the data manually.
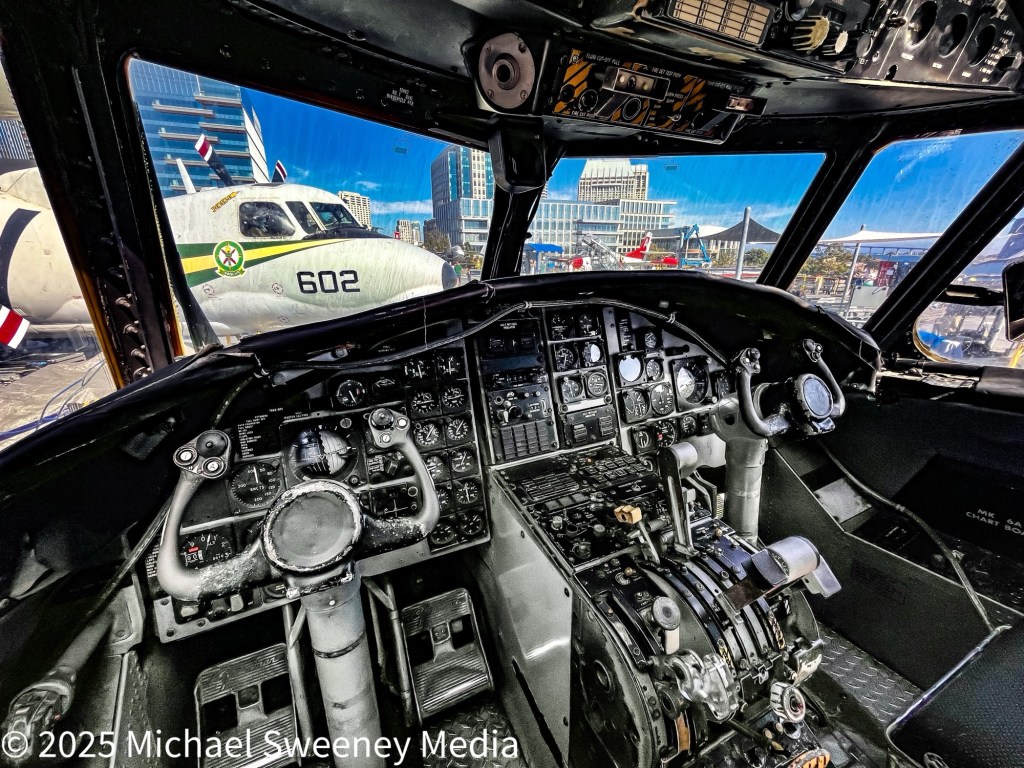
Here is a side by side comparison of the two images so you can easily see the differences. Top is the finished image and bottom is the original source image.

You can see the dramatic difference. This is where automatic HDR really worked it’s magic by capturing data from both extremes allowing me, the photographer, to really work the image to its best presentation.
Smartphones are good, sometimes very good but with a “real” camera, you’re in the driver’s seat and can get truly incredible results.
While many cameras have a ( automatic bracketing) setting that takes a series of photos for you, the real magic happens when you take control. You’ll capture multiple images of the same scene, each with a different exposure level—maybe one that’s perfectly exposed, another a little darker, and a third a bit brighter. Often times, landscape photographers will take several images instead of just two or three. Each photo is optimized for a particular “zone” of exposure. Once you’ve got your shots, you blend them together using software like Photomatix. This is where your images come to life! HDR is a game-changer for photographers who deal with challenging extreme light conditions.
HDR is a fantastic tool to have in your photography toolkit, and once you start experimenting with it, you’ll be hooked!
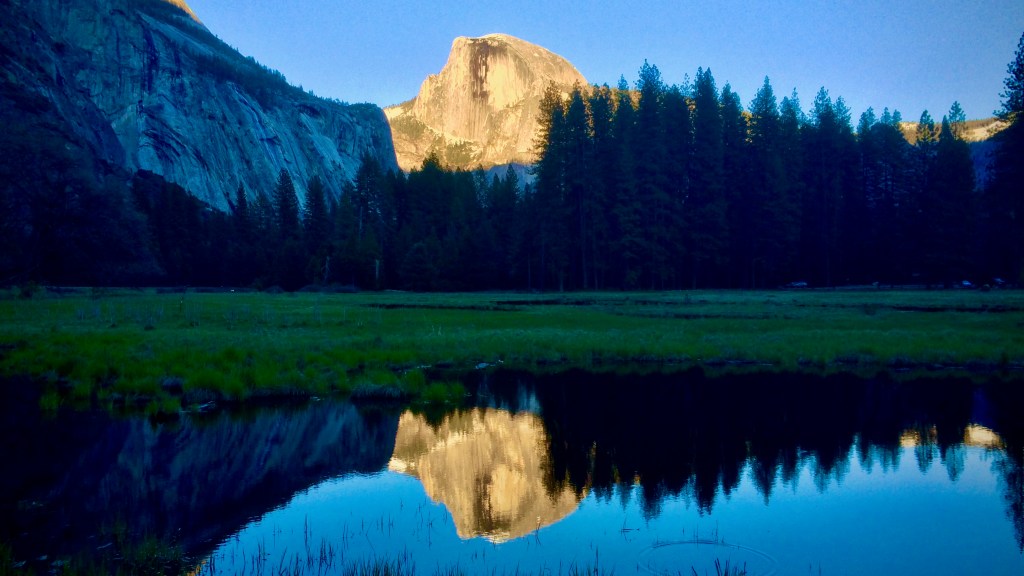
I’ll close with this image of El Capitan in Yosemite National Park. This was taken with an iPhone 5S with HDR software and then edited on the phone. This image broke the hearts of several “real” photographers by me with very expensive camera bodies and lenses. For the record, I did use a monopod to help steady the camera. And I took several sequences of shots. This was the best out of them.

Leave a comment